
Installing shingles can be intimidating, but with the right steps, anyone can do it, even without prior experience, I’ve encountered numerous roofing projects involving gable roofs. Here’s a comprehensive guide to ensure a successful installation.
1. Gather Your Tools and Materials
Before you begin, it’s crucial to have all the necessary tools and materials on hand. This will save you time and ensure a smooth installation process. Here’s what you’ll need:
- Hammer: A claw hammer for nailing the shingles.
- Roofing Nails: Ensure they are galvanized to prevent rusting.
- Chalk Line: To keep your rows of shingles straight.
- Measuring Tape: Accurate measurements are essential for cutting shingles to the correct size.
- Utility Knife: For trimming shingles to fit edges and corners.
- Roofing Shingles: Choose the type that suits your home best—most commonly asphalt.
- Underlayment: This is a critical barrier that goes under the shingles to prevent leaks.
- Roofing Cement: For securing shingles and sealing seams.
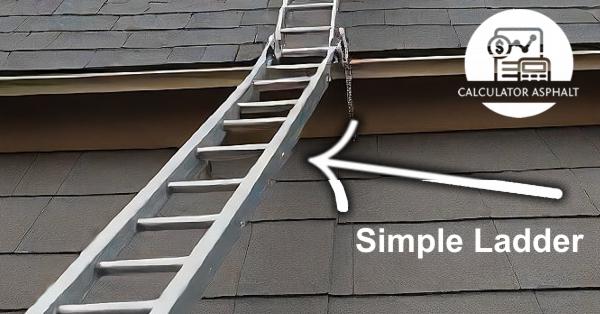
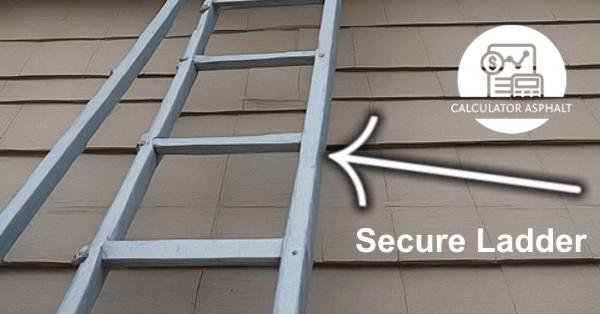
- Ladder: Make sure it’s sturdy and tall enough to reach the roof comfortably.
- Safety Gear: Gloves, safety glasses, and non-slip boots are a must.

2. Measure the Roof
Accurate measurements are the foundation of a successful roofing job. Here’s how to measure your roof’s dimensions:
- Calculate the Roof Area:
- Measure the length and width of each section of the gable roof.
- Multiply the length by the width to get the area for each section.
- Add up the areas to get the total roof area.
- Determine the Pitch:
- Use a level and a tape measure to determine the roof’s pitch, which is the rise over run (e.g., 4:12).
- Estimate Materials:
- For shingles, divide the total roof area by the coverage area per bundle of shingles (typically 33 square feet per bundle).
3. Install the Underlayment
The underlayment is a protective layer that goes beneath the shingles, shielding your roof from water and ice damage. Here’s how to properly install it:
- Start at the Bottom:
Begin at the lowest edge of the roof (the eaves) and roll out the underlayment horizontally across the roof. This helps ensure water runs off properly. - Overlap the Edges:
Overlap each row by about 4 inches to ensure complete coverage. This prevents water from seeping through the seams. - Secure with Staples or Nails:
Use staples or roofing nails to secure the underlayment every 8-10 inches. Be sure to smooth out any wrinkles as you go. - Cover the Entire Roof:
Continue rolling and securing the underlayment until the entire roof is covered. Don’t forget to cover the ridge as well.

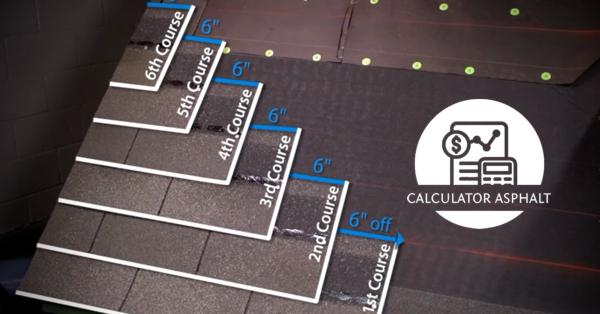
4. Start the First Row of Shingles
The first row of shingles, known as the starter course, is crucial for a strong foundation. Here’s how to lay it down correctly:
- Align the First Shingle:
Place the first shingle at the bottom edge of the roof, leaving a slight overhang (about ½ inch) to allow water to drip off rather than pool. - Nail the Shingle:
Use four nails per shingle, placing them about 1 inch above the cutouts or tabs. Ensure the nails are flush with the shingle surface but not cutting into it. - Continue the Row:
Align each subsequent shingle with the chalk line to keep the row straight. Overlap the shingles by half a tab for a staggered, weatherproof pattern. - Trim the Last Shingle:
When you reach the end of the row, trim the final shingle to fit perfectly with the roof’s edge using a utility knife.

5. Continue Laying Shingles
- Work in Rows:
Start each new row with a half shingle to stagger the joints. This prevents water from seeping between the shingles. - Nail with Precision:
Ensure each nail is placed in the designated nailing area, about 5-6 inches above the shingle edge. Keep the nails evenly spaced and flush with the shingle surface. - Cut and Fit:
Around vents, chimneys, and other roof features, cut shingles to fit snugly and use roofing cement to seal any gaps. - Check Alignment:
Periodically step back and check that your rows are aligned and straight. Adjust as needed to maintain a clean, professional look.Once the starter row is in place, you’ll build up the rest of the roof

Best Spacing and Nailing Pattern
Proper nail spacing is crucial for wind resistance and shingle securement. Generally, nails or staples should be placed approximately 6 inches from the bottom edge and 1 inch from each side of the shingle. Additional fasteners may be required in the nailing zone specified by the manufacturer.
| Shingle Position | Nail/Staple Placement |
|---|---|
| Starter Course | 6 inches from the bottom edge, 1 inch from the sides, and additional nails at the manufacturer’s recommended spacing |
| First Course | 6 inches from the bottom edge, 1 inch from the sides, and additional nails at the manufacturer’s recommended spacing |
| Subsequent Courses | 6 inches from the bottom edge, 1 inch from sides, and additional nails in the nailing zone specified by the manufacturer (typically 8-10 inches from the bottom edge) |
| Hip and Ridge Shingles | Nail/staple every 8-10 inches, following manufacturer’s guidelines for hip and ridge applications |
| High Wind Areas | Additional nails/staples may be required, typically spaced closer together (e.g., 6 inches apart) |
In my experience, proper roof ventilation and the use of quality roofing materials are key to ensuring a long-lasting roof. Always refer to the shingle manufacturer’s instructions for specific nailing patterns.
Slope Table for Various Shingle Types
| Shingle Type | Minimum Slope | Maximum Slope | Recommended Slope |
|---|---|---|---|
| Asphalt Shingles (3-tab) | 2:12 | 21:12 | 4:12 to 12:12 |
| Asphalt Shingles (Architectural/Dimensional) | 2:12 | 21:12 | 4:12 to 12:12 |
| Wood Shingles | 3:12 | 20:12 | 4:12 to 12:12 |
| Wood Shakes | 4:12 | 20:12 | 4:12 to 12:12 |
| Slate Shingles | 4:12 | Vertical | 8:12 to 16:12 |
| Clay Tiles | 2.5:12 | Vertical | 4:12 to 8:12 |
| Concrete Tiles | 2.5:12 | Vertical | 4:12 to 8:12 |
| Metal Shingles | 2:12 | Vertical | 3:12 to 12:12 |
| Synthetic Shingles | 2:12 | Vertical | 4:12 to 12:12 |
6. Cap the Ridge
The ridge cap is the finishing touch, protecting the peak of your roof from weather exposure. Here’s how to do it:
- Cut Ridge Cap Shingles:
If you’re using standard shingles for the ridge cap, cut them into individual caps according to the manufacturer’s instructions. - Start at the End Opposite the Prevailing Wind:
Begin capping at the end of the roof opposite to where the wind generally blows. This ensures the caps won’t lift. - Overlap Each Cap:
Place each cap so it overlaps the previous one by about 5-6 inches. Nail each cap on both sides, ensuring the nails are hidden under the overlap. - Seal the Final Cap:
For the last cap, use extra roofing cement to secure it, making sure it’s firmly attached and waterproof.


7. Inspect Your Work
- Before you consider the job done, a thorough inspection is necessary:
- Check for Loose Shingles:
Walk carefully across the roof and tug on a few shingles to ensure they are secure. - Look for Exposed Nails:
Any exposed nails should be covered with roofing cement to prevent leaks. - Evaluate Alignment:
Ensure all rows are straight, and the shingles are properly aligned. Crooked rows not only look unprofessional but can also lead to leaks. - Clean Up:
Remove any debris, excess nails, or loose shingles from the roof. A clean roof is essential for longevity.
- Check for Loose Shingles:

8. Install Flash ing Around Roof Penetrations
Roof penetrations like chimneys, vents, and skylights require flashing to prevent water from seeping in around these areas. Here’s how to properly install flashing:
- Choose the Right Flashing:
Select flashing made from a material that complements your shingles, such as aluminum or galvanized steel. Preformed flashing kits are often available for standard roof penetrations. - Install Flashing at the Base of Penetrations:
Start by placing a piece of flashing at the bottom of the penetration. The flashing should extend about 4-6 inches up the side of the penetration and under the surrounding shingles. - Secure the Flashing:
Nail the flashing in place with roofing nails, ensuring that the next row of shingles covers the nails to prevent water ingress. - Wrap the Sides and Top:
Add additional pieces of flashing around the sides and top of the penetration. The side pieces should overlap the base flashing, and the top piece should go over the sides to create a watertight barrier. - Seal with Roofing Cement:
Apply roofing cement around the edges of the flashing and under any overlapping shingles to ensure a tight seal.

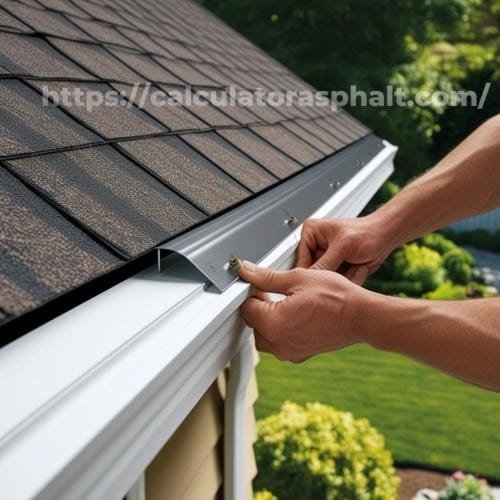
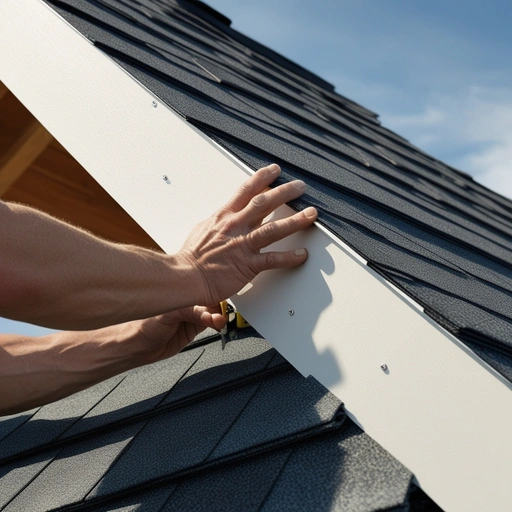
9. Install Drip Edge
The drip edge is an essential component that directs water away from the fascia and prevents water from seeping under the shingles. Installing it correctly is key to avoiding water damage:
- Start at the Eaves:
Begin by installing the drip edge along the eaves, and the horizontal edges of the roof. Align the drip edge so it extends about ½ inch beyond the roof decking. - Nail in Place:
Use roofing nails to secure the drip edge in place, spacing the nails about 12 inches apart. Make sure the nails are driven into the roof deck, not just the fascia. - Install Along the Rakes:
After the eaves, install the drip edge along the rake edges (the sloped edges of the roof). Overlap the ends of the drip edge pieces by at least 2 inches to ensure continuous coverage. - Seal the Corners:
Where the eave and rake drip edges meet, make sure the corners are snug and well-sealed with roofing cement to prevent leaks.
[IMAGE HERE: Drip Edge Installation: A photo showing the drip edge being nailed into place at the eave, with a clear view of the overlap.]
10. Deal with Valleys
Valleys are the areas where two roof planes meet and are particularly prone to leaks if not properly protected. Here’s how to secure the valleys:
- Install Valley Flashing:
Use a wide, metal valley flashing, typically made of aluminum or galvanized steel. Position it in the center of the valley, ensuring it extends several inches up each side of the valley. - Nail the Flashing:
Secure the flashing with roofing nails, placing them at the edges of the flashing rather than in the center. This minimizes the chance of leaks. - Lay Shingles Over the Valley:
Depending on the type of shingles and your preference, you can use a closed or open valley. For a closed valley, lay shingles over the flashing, trimming them to follow the valley line. For an open valley, leave the center of the flashing exposed, trimming shingles so they meet at the edge of the flashing. - Seal the Valley:
Apply roofing cement under the edges of the shingles that meet in the valley to prevent water from seeping underneath.
[IMAGE HERE: Valley Flashing and Shingle Installation: Show a detailed image of shingles being cut and laid over valley flashing, highlighting the difference between open and closed valleys.]
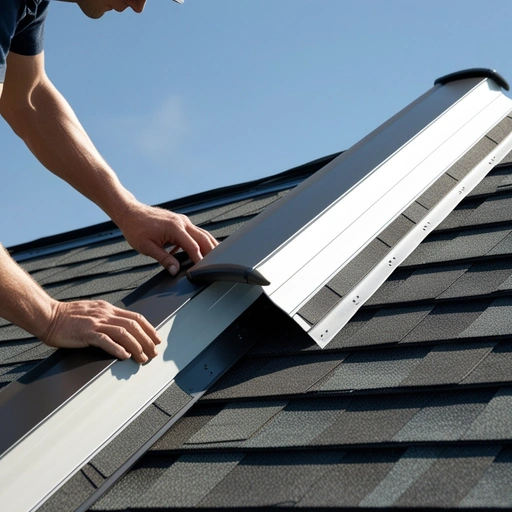
11. Address Roof Hips and Ridges
Hips and ridges require special attention, as they are more exposed to wind and weather. Follow these steps to ensure they are properly protected:
- Cut Shingles for Hips and Ridges:
Cut the shingles into individual pieces that will be used as ridge caps. These pieces should be slightly wider than the ridge to ensure full coverage. - Start at the Bottom of the Hip:
For hips, begin at the bottom and work your way up, overlapping each shingle piece by about 5-6 inches. Nail each piece on both sides, ensuring the nails are covered by the next piece. - Overlap Ridge Caps:
When working on the ridge, start at one end and overlap each shingle piece in the same direction as the prevailing wind. This prevents the wind from lifting the shingles. - Secure the Last Ridge Cap:
The last piece of ridge cap should be secured with extra roofing cement to ensure it stays in place and is watertight.


12. Final Cleanup and Inspection
Once all the shingles are in place, it’s time for a final cleanup and thorough inspection:
- Remove Debris:
Walk around the roof and remove any leftover nails, shingle pieces, or other debris. A clean roof is crucial for longevity. - Inspect for Loose Shingles:
Carefully inspect the roof for any loose or misaligned shingles. Tug gently on a few shingles in each section to ensure they are securely nailed. - Check for Exposed Nails:
Make sure all nails are covered by shingles or roofing cement. Exposed nails are a common source of leaks. - Verify Seals Around Flashing:
Double-check that all flashing is well-sealed with roofing cement, especially around roof penetrations like chimneys and vents. - Clean the Gutters:
Clear out any debris that may have fallen into the gutters during the installation process. This prevents clogs and ensures proper water drainage.

By following these steps, you’ll have a well-installed, durable shingle roof that not only looks great but also provides reliable protection for your home. Regular maintenance and inspections will help extend the life of your roof, keeping it in top condition for years to come.

Thank you for following this guide. Be sure to check out our other detailed home improvement articles for more expert advice!