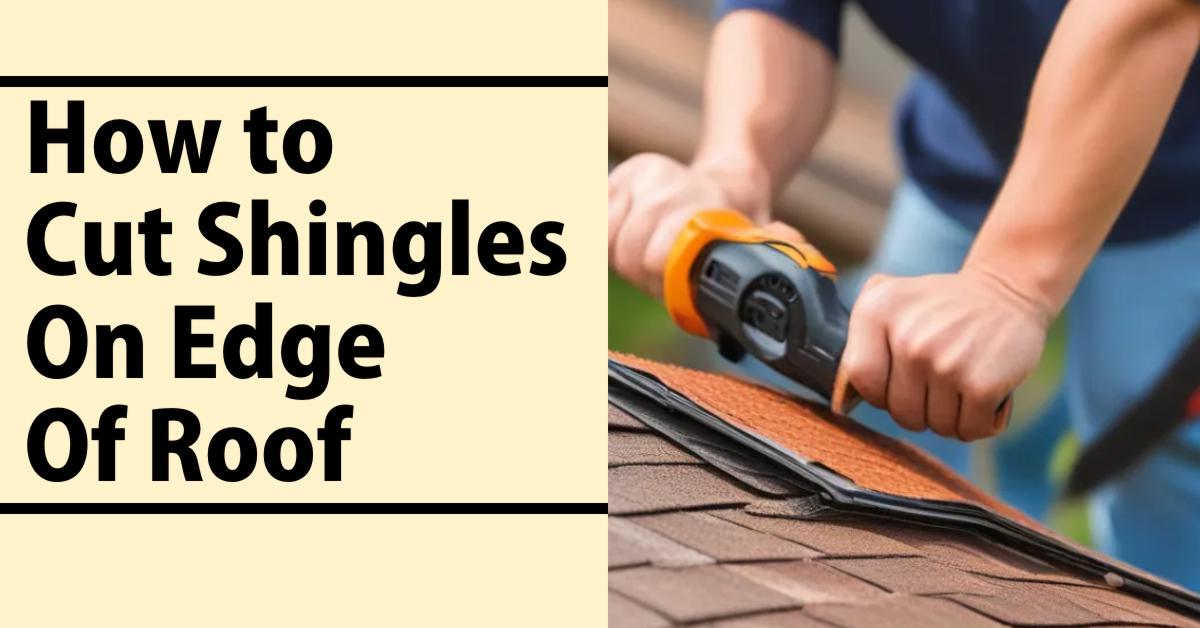
As a seasoned civil engineer and construction specialist with over 25+ years of hands-on experience, I understand the importance of precise and professional cutting when it comes to shingles on the edge of a roof. A clean, well-executed cut not only enhances the aesthetic appeal of the roofing installation but also contributes to its durability and longevity. Improperly cut shingles can lead to gaps, leaks, and premature wear, compromising the integrity of the entire roofing system. Within this comprehensive discussion, I’ll share my expertise and insights on the essential tools, techniques, and best practices for cutting shingles on the edge of a roof, ensuring a seamless and long-lasting finish.
Tools for Cutting Shingles on the edge of the roof
Having the right tools is crucial for achieving precise and efficient cuts when working with shingles. Over the years, I’ve used and evaluated various tools, and here are some of the most reliable options:
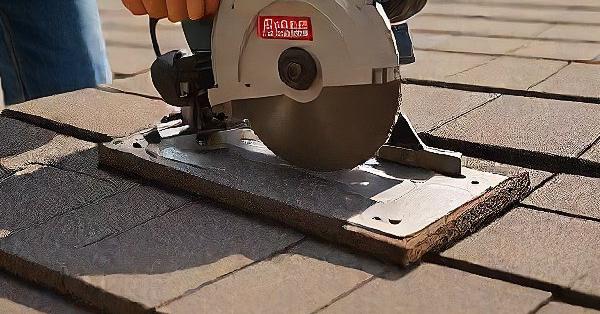
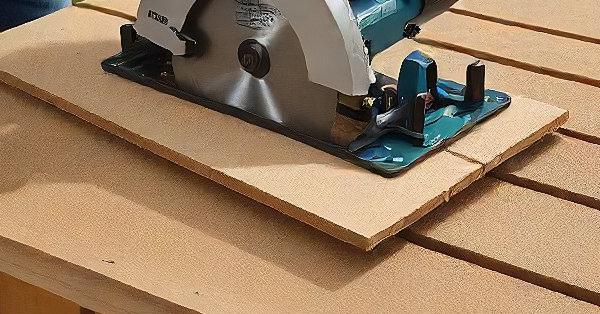
Circular Saw:
A circular saw is a versatile tool that can handle a wide range of cutting tasks, including cutting shingles. It provides a clean, straight cut and can be used for both straight and angled cuts. However, it’s essential to take proper safety precautions and ensure that the saw is equipped with a suitable blade for cutting asphalt or composite shingles.
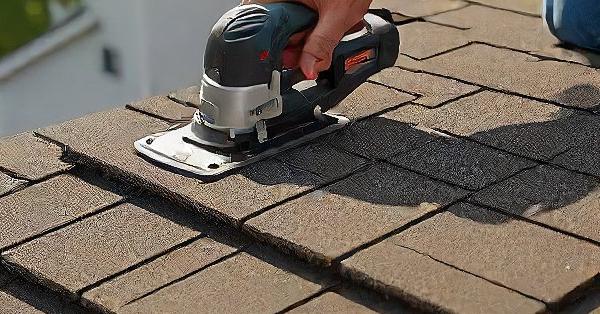
Oscillating Tool:
An oscillating tool, also known as a multi-tool, is a handy option for cutting shingles, particularly in tight spaces or around obstacles like vents or chimneys. Its compact size and oscillating blade allow for precise and controlled cuts. However, it may not be the most efficient choice for larger cutting jobs.
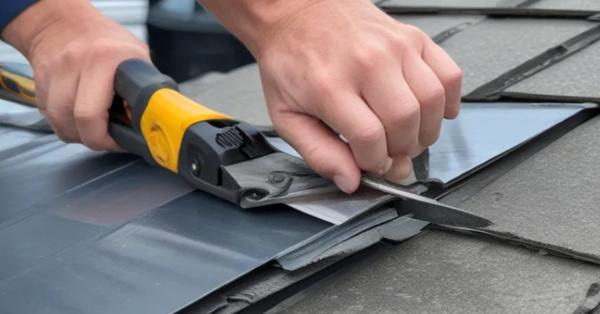
Tin Snips:
Tin snips are a budget-friendly option for cutting shingles, especially if you’re working with thinner or more flexible materials. They are easy to use and can provide a clean cut, but they may not be as precise as other tools, and they can be more physically demanding for larger projects.
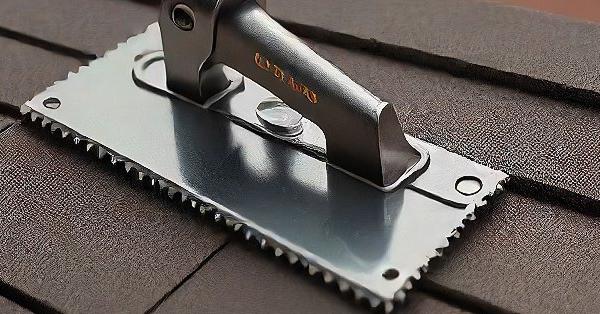
Shingle Cutter:
As the name suggests, a shingle cutter is a specialized tool designed specifically for cutting shingles. It typically features a guillotine-style cutting mechanism that allows for consistent and accurate cuts. While it may be an investment, a shingle cutter can save time and effort, especially for larger roofing projects.
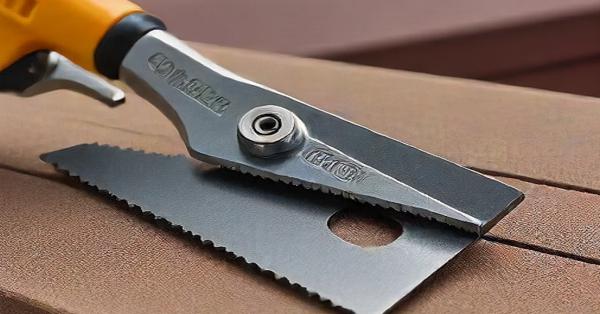
Hook Blade:
A hook blade is a utility knife with a sharp, curved blade that can be particularly useful for cutting shingles. It allows for precise cuts and can be used for both straight and angled cuts. However, it requires a steady hand and maybe more time-consuming for larger cutting jobs.
Each tool has its advantages and limitations, and the choice ultimately depends on the specific project requirements, budget, and personal preference. Regardless of the tool you choose, it’s crucial to prioritize safety and follow proper handling and usage guidelines.
Cutting Shingles with Different Tools
When it comes to cutting shingles, the technique and approach may vary depending on the tool you’re using. Here are some detailed instructions and insights for cutting shingles with different tools:
Circular Saw Shingles Cutting:
- Set the saw blade depth to slightly deeper than the shingle thickness to ensure a clean cut.
- Use a saw guide or straight edge to ensure a straight line for the cut.
- Take proper safety precautions, such as wearing eye protection and ensuring a stable work surface.
- For angled cuts, adjust the saw blade to the desired angle and make a test cut on a scrap piece to ensure accuracy.
- Apply firm, even pressure while guiding the saw along the cutting line.
Oscillating Tool Shingles Cutting:
- Choose the appropriate blade for cutting shingles, typically a bi-metal or wood-cutting blade.
- Mark the cutting line clearly on the shingle.
- Hold the tool firmly and guide it along the marked line, allowing the oscillating blade to cut through the material.
- Take extra care when cutting around obstacles or tight spaces, as the oscillating tool excels in these situations.
Tin Snips Shingles Cutting:
- For thinner or more flexible shingles, tin snips can provide a clean cut.
- Mark the cutting line and use the snips to follow the line, applying firm pressure as you cut.
- Be prepared to exert more physical effort, especially for thicker or more rigid shingles.
Shingle Cutter Shingles Cutting:
- Follow the manufacturer’s instructions for proper setup and usage of the shingle cutter.
- Align the shingle with the cutting guide and apply firm, even pressure to the cutting mechanism.
- Ensure that the shingle is securely held in place during the cutting process to prevent slippage or inaccuracies.
Hook Blade Shingles Cutting:
- Use a straight edge or speed square to guide the hook blade along the cutting line.
- Apply firm, even pressure while cutting, and be prepared to make multiple passes for thicker shingles.
- Take extra care when cutting around corners or curves, as the hook blade allows for more precise control.
Regardless of the tool you choose, it’s essential to practice on scrap pieces or leftover shingles to get a feel for the cutting process and ensure accurate results before working on the actual roof installation.
Tips for Cutting Shingles on Different Roof Features
The technique for cutting shingles may vary depending on the specific roof features you’re working with. Here are some tips for cutting shingles on different roof features:
Gable Roof:
- For cutting shingles along the rake edges (sloped sides) of a gable roof, use a chalk line or string line to mark a straight cutting path.
- Follow the marked line with your cutting tool of choice, ensuring a consistent and straight cut.
- Pay special attention to the angles and overlaps at the gable peaks to ensure a proper fit.
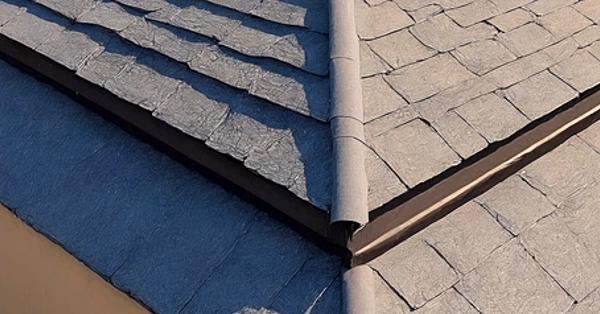
Ridge Cap:
- The ridge cap is the horizontal ridge at the peak of a roof, where the two roof planes intersect.
- Measure and mark the desired angle for the ridge cap shingles, typically following the roof pitch.
- Use a hook blade or shingle cutter to make precise angled cuts, ensuring a tight fit along the ridge.
- Proper installation of ridge cap shingles is crucial for preventing leaks and ensuring a watertight seal.
Regardless of the roof feature, it’s essential to take accurate measurements, mark your cutting lines clearly, and follow the recommended techniques for your chosen cutting tool. Attention to detail and precision are key to achieving a professional and long-lasting roofing installation.
Shingles Installation Tips
While cutting shingles is a crucial step in the roofing process, it’s important to remember that it’s just one part of the overall installation. Here are some installation tips to keep in mind:
Proper Measurement and Alignment:
Before cutting any shingles, take accurate measurements of the roof area and ensure proper alignment of the shingles. This will help minimize waste and ensure a consistent, uniform appearance.
Follow Manufacturer Guidelines:
Always refer to the manufacturer’s guidelines for shingle installation, including recommended overlaps, nail patterns, and sealing techniques. Proper installation is essential for ensuring the longevity and performance of the roofing system.
Maintain Consistency:
Once you’ve established a pattern and technique for cutting and installing shingles, maintain that consistency throughout the project. This will contribute to a more professional and cohesive look.
Pay Attention to Details:
Don’t overlook the smaller details, such as proper sealing, flashing, and ventilation. These seemingly minor elements can have a significant impact on the overall performance and durability of the roof.
Now, Let’s start step-by-step Shingles Installation
Safety Always Comes First for me
Before diving into the cutting process, it’s essential to prioritize safety. Working on a roof can be hazardous, and taking the necessary precautions is crucial. Ensure you have the proper safety equipment, including:
A secure ladder or scaffolding system, Non-slip roof jacks or brackets, Safety harnesses and roof anchors, and Sturdy work boots with excellent traction are best practices shingle installation tools.
Gather Your Tools
Having the right tools at hand can make the cutting process much more efficient and precise. Here’s what you’ll need:
- A sharp utility knife or hook blade knife
- A straight edge or speed square
- A chalk line or string line
- A measuring tape
- A pencil or marker
Understanding Roof Edge Types
Rake Edges
Rake edges are the sloped sides of a gable roof that run from the eaves to the ridge. These edges require precise cutting to ensure a clean and watertight finish.
Hip Edges
Hip edges are formed where two sloping roof planes intersect, creating a diagonal edge. Cutting shingles along hip edges requires careful measurements and angled cuts.
Valley Edges
Valley edges are the internal intersections of two sloping roof planes, creating a channel for water runoff. Cutting shingles in these areas is critical to prevent leaks and ensure proper water flow.
Roof Shingles Cutting Techniques
Straight Cuts
For rake edges, you’ll often need to make straight cuts to trim shingles to the desired length. Here’s how:
- Measure and mark the desired length on the shingle.
- Use a straight edge or speed square to guide your utility knife.
- Apply firm, even pressure while cutting to ensure a clean, straight line.
Angled Cuts
Hip edges and some valley edges may require angled cuts to conform to the slope of the roof. Here’s the process:
- Measure and mark the desired angle on the shingle.
- Use a speed square or protractor to guide your cuts.
- Make multiple shallow cuts, gradually increasing the depth until you achieve the desired angle.
Cutting Valley Shingles
Valley shingles require special attention to ensure proper water flow and leak prevention. Follow these steps:
- Measure and mark the desired angle on the shingle.
- Cut along the marked line, ensuring a tight fit against the valley flashing.
- Apply a generous amount of roofing cement or sealant for a watertight seal.
How do I replace corner shingles on the edge of a roof?
I follow these steps:
- I carefully remove the damaged or worn corner shingles using a pry bar and hammer, being careful not to damage the surrounding shingles or roof deck.
- I inspect the area and make any necessary repairs to the roof deck or underlayment before proceeding.
- I measure and mark the cutting lines for the new corner shingles, ensuring they will fit snugly into the corner and overlap properly with the adjacent shingles.
- I use a sharp utility knife or hook blade to cut the new shingles along the marked lines, making precise angled cuts to fit the corner.
- I apply a generous amount of roofing cement or sealant to the back of the new corner shingles and along the edges.
- I carefully slide the new corner shingles into place, ensuring they fit tightly and are properly overlapped with the surrounding shingles.
- I secure the new corner shingles with the recommended number and placement of roofing nails or staples, being careful not to overdrive or underdrive the fasteners.
- I apply additional roofing cement or sealant along the edges and overlaps of the new corner shingles for a watertight seal.
- I inspect my work to ensure the new corner shingles are installed correctly, with no gaps or potential leakage points.
- I dispose of any waste or debris properly, following local regulations for construction waste disposal.
By following these steps carefully, I can successfully replace corner shingles on the edge of a roof, ensuring a secure and watertight installation while maintaining the integrity and aesthetic of the overall roofing system.
How to Cut Shingles Off the Edge Of a Roof in a Straight Line?
To cut shingles off the edge of a roof in a straight line, I first use a chalk line or string line to mark the desired cutting path along the rake edge. I ensure the line is taut and follows the straight edge of the roof line. Then, using a sharp utility knife or hook blade, I cut along the marked chalk line in one smooth, controlled motion. I apply firm, even pressure to slice cleanly through the shingles.
If needed, I make multiple passes with the blade to cut through thicker shingles. A straight edge or speed square can help guide my cuts for a perfectly straight finish. I take care not to cut into the roof deck below the shingles.
Quality Assurance
Inspect Your Work
After cutting and installing the shingles along the roof edges, take the time to inspect your work thoroughly. Look for any gaps, loose edges, or potential areas where water could seep through.
Seal and Secure
If you notice any potential issues, don’t hesitate to seal and secure the shingles with roofing cement or sealant. A well-sealed edge is crucial for preventing leaks and prolonging the life of your roof.
Answers Based On My Experience
What is the best way to cut shingles around vents or pipe protrusions on the roof?
I recommend using an oscillating tool or a hook blade to carefully cut the shingles around vents or pipe protrusions. I would mark the cutting line and make precise cuts to ensure a tight fit around the obstruction. Then, I would apply roofing cement or sealant to secure the shingles and prevent water intrusion.
How do you ensure straight cuts along the rake edges of a gable roof?
To ensure straight cuts along the rake edges (sloped sides) of a gable roof, I use a chalk line or string line to mark a straight cutting path. I then follow the marked line with my cutting tool of choice, such as a circular saw or a hook blade, to achieve consistent and straight cuts.
Can you cut shingles with a utility knife?
While it is possible to cut shingles with a utility knife, I generally do not recommend it. A utility knife may not provide enough cutting power or precision for shingles, and it can be more time-consuming and physically demanding. Instead, I prefer to use tools specifically designed for cutting shingles, such as a shingle cutter or a hook blade.
How do you cut shingles for a hip roof?
For hip roofs, where the roof planes intersect at an angle, I measure and mark the desired angle, typically following the roof pitch. I then use a hook blade, shingle cutter, or an adjustable circular saw to make precise angled cuts to fit the hip areas.
What safety precautions should be taken when cutting shingles on a roof?
When cutting shingles on a roof, I always wear proper safety gear, such as non-slip work boots, gloves, eye protection, and a hard hat. I secure my work area with roof jacks, safety harnesses, or fall protection systems. I handle cutting tools responsibly, follow the manufacturer’s instructions, and stay alert and focused throughout the process.
Can you reuse cut shingle pieces on other areas of the roof?
I generally do not recommend reusing cut shingle pieces on other areas of the roof. Cut shingle pieces may have compromised integrity or expose the fiberglass mat, making them more susceptible to moisture damage and premature failure. Instead, I prefer to use full, undamaged shingles to ensure a consistent and reliable installation.
How do you cut shingles for a valley on the roof?
For valleys (internal intersections of two sloping roof planes), I measure and mark the desired angle on the shingles to match the valley flashing. I then cut along the marked line, ensuring a tight fit against the valley flashing. I apply a generous amount of roofing cement or sealant for a watertight seal.
What is the difference between cutting shingles with a circular saw and an oscillating tool?
A circular saw is better suited for longer, straight cuts, and I can use it to handle a wider range of cutting tasks. An oscillating tool is more compact and maneuverable, making it ideal for me to cut shingles in tight spaces or around obstacles. While the oscillating tool may be more precise, it is less efficient for larger cutting jobs.
How do you maintain consistency when cutting and installing shingles?
To maintain consistency when cutting and installing shingles, I establish a pattern and technique and then follow that consistently throughout the project. I follow the manufacturer’s guidelines for overlaps, nail patterns, and sealing techniques. I pay attention to details and ensure proper alignment and measurement before cutting any shingles.
Can you cut shingles with a grinder or angle grinder?
While it is possible to cut shingles with a grinder or angle grinder, I generally do not recommend it. These tools can create a lot of dust and debris, potentially compromising the integrity of the shingles. They may also cause the shingles to crack or shatter due to the high-speed cutting action. Instead, I prefer to use tools specifically designed for cutting shingles, as they are safer and more controlled.
How do you cut shingles for a dormer on the roof?
For dormers (a vertical window projecting from a sloping roof), I measure and mark the cutting lines on the shingles to fit around the dormer. I then use an oscillating tool or a hook blade to make precise cuts, ensuring a tight fit against the dormer flashing. I apply roofing cement or sealant to secure the shingles and prevent water intrusion.
Can you cut shingles with a jigsaw?
While a jigsaw can technically cut shingles, I do not find it to be the ideal tool for this task. Jigsaws are better suited for cutting curves or intricate shapes in thinner materials. For cutting shingles, I prefer to use tools specifically designed for this purpose, such as a shingle cutter, circular saw, or hook blade, to ensure clean, precise cuts and minimize the risk of damage to the shingles.
How do you prevent shingles from cracking or chipping when cutting them?
To prevent shingles from cracking or chipping during the cutting process, I use a sharp, high-quality blade or cutting tool. I avoid excessive force or pressure and make clean, controlled cuts. It’s also important for me to use the right tool for the job and follow the manufacturer’s instructions for proper use and maintenance.
Can you cut shingles before installing them on the roof?
Yes, I can cut shingles before installing them on the roof. This can be more efficient and precise than cutting them while on the roof, especially for complex cuts or patterns. I measure and mark the cutting lines on the shingles, and use the appropriate cutting tool in a controlled environment before taking the cut shingles up to the roof for installation.
How do you ensure a tight fit when cutting shingles around corners or curves?
When cutting shingles around corners or curves, I use a hook blade or an oscillating tool for precise control and maneuverability. I mark the cutting lines clearly and make multiple passes or shallow cuts if needed to achieve the desired shape. I apply roofing cement or sealant to secure the shingles and ensure a tight, watertight fit.
What are the advantages of using a shingle cutter over other cutting tools?
A shingle cutter is a specialized tool designed specifically for cutting shingles. It typically features a guillotine-style cutting mechanism that allows for consistent and accurate cuts. While it may require an investment, a shingle cutter can save me time and effort, especially for larger roofing projects, and provide a more precise and efficient cutting experience compared to other tools.
How do you dispose of cut shingle pieces and waste safely?
I dispose of cut shingle pieces and waste properly according to local regulations. Many landfills have designated areas for construction and demolition waste, including asphalt shingles. I contact my local waste management authority or roofing disposal service for specific guidelines on proper disposal or recycling options in my area.
Can you cut shingles with a reciprocating saw or sawzall?
While I can cut shingles with a reciprocating saw or sawzall, I generally do not recommend it. These tools are designed for demolition or rough cutting tasks, and may not provide the precision and control required for cutting shingles. The reciprocating motion can also cause the shingles to crack or shatter. Instead, I prefer to use tools specifically designed for cutting shingles, such as a shingle cutter or hook blade.
How do you ensure accurate measurements when cutting shingles for complex roof features?
When cutting shingles for complex roof features, such as valleys, hips, or dormers, I take accurate measurements and mark the cutting lines. I use a combination of measuring tools, such as a tape measure, straight edge, and speed square, to ensure precise markings. I may also consider making templates or test cuts on scrap pieces before cutting the actual shingles to ensure a proper fit.