As an experienced civil engineer and Shingles Roofing specialist with over 25+ years in the industry, I understand the importance of proper shingle roofing installation and maintenance. Here are some must-know tips to ensure the success of your shingle roofing project:
Hire a Reputable Roofing Contractor
While DIY projects can be tempting, hiring a reputable and experienced roofing contractor is often the best approach for shingle roofing installations or major repairs. A professional contractor will have the necessary skills, equipment, and knowledge to ensure the job is done right from the start, minimizing the risk of costly mistakes or future issues.
Always use High-Quality Materials
Investing in high-quality materials can pay off in the long run when it comes to shingle roofing. Premium shingles from reputable manufacturers offer better durability and performance and often come with longer warranties, providing added peace of mind and potential cost savings.
Proper Underlayment and Flashing Installation
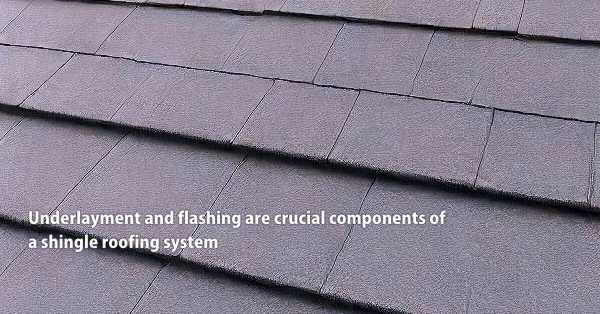
Underlayment and flashing are crucial components of a shingle roofing system, protecting against water infiltration and ensuring proper drainage. Ensuring these components are installed correctly, using the appropriate materials and techniques, can prevent leaks and extend the lifespan of your shingle roof.
Follow the Manufacturer’s Installation Guidelines
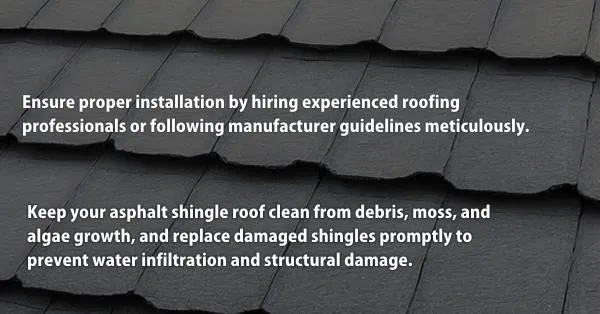
Each shingle roofing material has specific installation guidelines provided by the manufacturer. Adhering to these guidelines is essential for maintaining the warranty and ensuring the shingles perform as intended. Proper nailing patterns, overlap measurements, and other installation details should be followed in the letter.
Prioritize Ventilation and Insulation
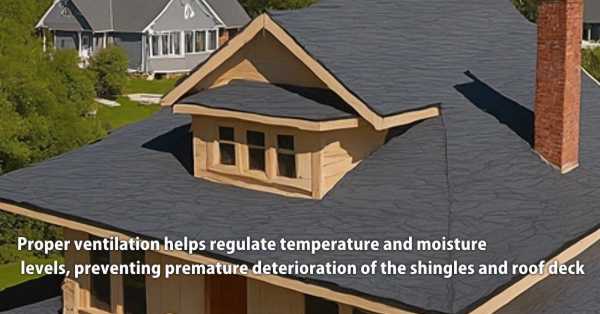
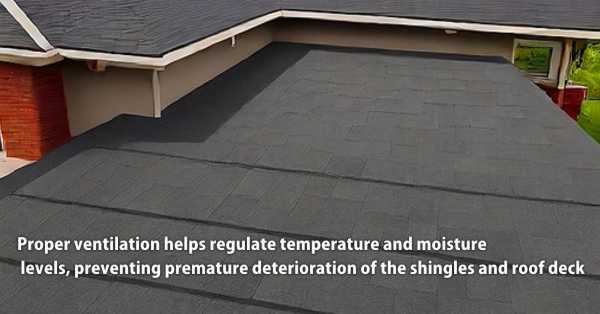
Adequate ventilation and insulation play a vital role in the performance and longevity of shingle roofing. Proper ventilation helps regulate temperature and moisture levels, preventing premature deterioration of the shingles and roof deck. Insulation, on the other hand, improves energy efficiency and reduces the strain on your roofing system.
Regular Inspections and Maintenance
Conducting regular inspections and performing necessary maintenance is crucial for identifying and addressing potential issues before they escalate into major problems. Look for signs of damage, such as cracked, curled, or missing shingles, and address them promptly to prevent leaks and further deterioration.
Consider Climate and Weather Resistance
Different shingle roofing materials perform differently in various climate conditions. When selecting shingles, consider the weather patterns and environmental factors in your area, such as high winds, heavy snowfall, or extreme temperatures. Choosing a material that can withstand these conditions can save you from costly repairs or replacements down the line.
Plan for Proper Waste Disposal
Shingle roofing projects can generate a significant amount of waste material, including old shingles, nails, and packaging. Plan for proper waste disposal by researching local regulations and arranging for appropriate waste containers or recycling facilities to handle the debris responsibly.
By following these must-know tips, you can ensure the success of your shingle roofing project, maximize the lifespan of your investment, and enjoy the benefits of a well-constructed and visually appealing roof for years to come.
Shingles Roofing Guide
As a licensed civil engineer and construction specialist with over 25 years of experience in asphalt materials, specifications, and roadway construction, I have witnessed the evolution of roofing materials and techniques firsthand. Among the various options available, shingle roofing has long been a popular choice for homeowners due to its versatility, durability, and aesthetic appeal. Within this detailed guide, I will guide you towards the best shingle roofing, exploring its different types, the shingle installation processes, maintenance requirements, and environmental considerations.
Types of Shingle Roofing
Asphalt Shingles
Asphalt shingles are the most widely used roofing material in the residential market. They are composed of a fiberglass or organic mat coated with asphalt and topped with mineral granules. Asphalt shingles come in a variety of styles, colors, and textures, offering a range of options to suit different architectural designs.
Wood Shingles
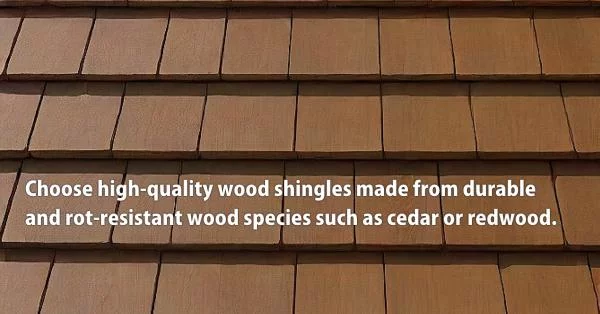
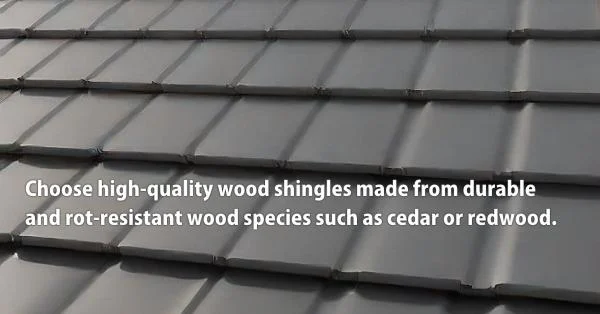
Crafted from natural wood, such as cedar, redwood, or pine, wood shingles offer a rustic and traditional appearance. While they require more maintenance than other shingle types, wood shingles are known for their durability and ability to enhance the charm of historic or craftsman-style homes.
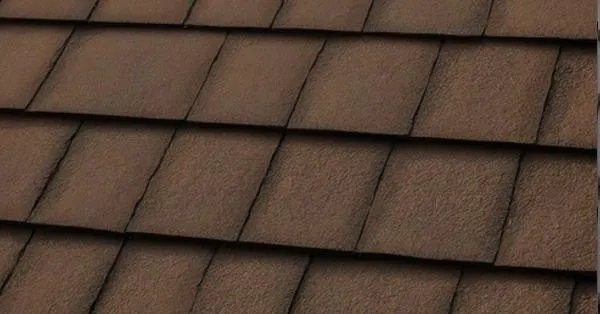
Metal Shingles
Metal shingles, typically made of steel, aluminum, or copper, provide a sleek and modern look. They are highly durable, fire-resistant, and require minimal maintenance. Metal shingles are available in a variety of styles, including those that mimic the appearance of traditional shingles like slate or cedar shakes.
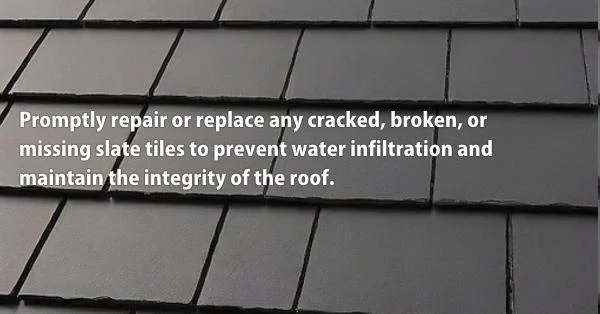
Slate Shingles
Slate shingles are a premium roofing material renowned for their longevity and elegance. Quarried from natural stone, slate shingles offer a distinctive look and can last over a century with proper maintenance. However, they are also one of the most expensive shingle options.
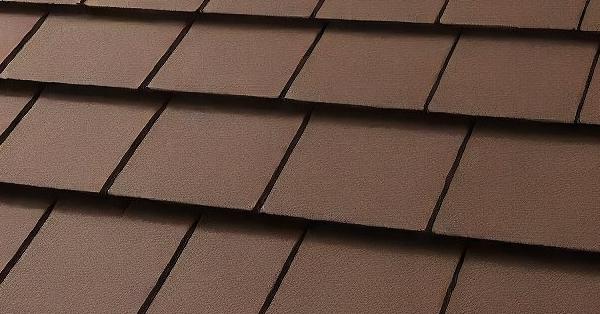
Blended / Composite Shingles
Composite shingles are a relatively new addition to the roofing market. They are made from a blend of various materials, such as recycled plastics, rubber, and other synthetic components. Composite shingles are designed to mimic the appearance of traditional shingles while offering enhanced durability and resistance to weathering.
Pros and Cons of Shingle Roofing Materials
When choosing a shingle roofing material, it’s important to consider various factors, including durability, cost-effectiveness, aesthetic appeal, maintenance requirements, and environmental impact.
Durability
Shingle roofing materials vary in their lifespan and resistance to weather conditions. For instance, asphalt shingles typically last between 15 to 30 years, while slate and metal shingles can endure for over 50 years with proper maintenance.
Cost-effectiveness
Asphalt shingles are generally the most cost-effective option, followed by composite and metal shingles. Wood and slate shingles tend to be more expensive due to their premium materials and labor-intensive installation.
Aesthetic Appeal
Shingle roofing offers a wide range of styles, colors, and textures to complement various architectural designs. Wood and slate shingles provide a traditional and timeless look, while metal and composite shingles offer modern and unique aesthetic options.
Maintenance Requirements
Some shingle materials, like wood and asphalt, require more maintenance than others. Regular cleaning, inspections, and repairs may be necessary to ensure the longevity of the roofing system.
Environmental Impact
The environmental impact of shingle roofing materials varies. Asphalt shingles, for example, have a higher carbon footprint during manufacturing, while wood and slate shingles are more eco-friendly but may contribute to deforestation if not sourced responsibly. Metal and composite shingles offer more sustainable options with their recyclability and longer lifespan.
How to Install Asphalt Shingles On a Roof
As an experienced civil engineer, I’ll guide you through the key steps to properly install asphalt shingles on a roof:
Preparation
- Inspect and repair any issues with the roof deck. Ensure it is clean, dry and smooth.
- Install underlayment (felt paper or synthetic) to provide a protective moisture barrier.
- Install drip edge flashing along the eaves and gable rake edges.
Installation
- Start at the bottom edge, nailing the first row of shingles with 4 nails per shingle.
- For subsequent rows, offset each shingle vertically by 6 inches from the one below it.
- Use 4 nails per shingle placed 1 inch above the cutout and 1 inch from each end.
- Ensure a 5-6 inch overlap between shingle courses in a weathered pattern.
- Cut and fit shingles around vents, chimneys, and other protrusions using flashing.
- Install ridge cap shingles along the peaks using a heavy bead of roofing cement.
Key Points
- Follow manufacturer nailing instructions and overlap precisely for wind resistance.
- Use caulk or roof cement around penetrations for a waterproof seal.
- Work from the bottom upwards for a proper weathered installation.
- Take safety precautions when working on pitched roofs.
Installing asphalt shingles correctly with proper nailing, overlap and flashing will ensure a durable, weathertight roof system. Don’t hesitate to hire professionals if you lack roofing experience.
Installation Process for Shingle Roofing
Proper installation is crucial for the performance and longevity of shingle roofing. Shingle Roofing is a step-by-step process. The process typically involves the following steps:
Preparation of the Roof Surface
Before installing shingles, the existing roofing material must be removed, and the roof deck inspected and repaired if necessary. Proper ventilation and underlayment installation are also essential for preventing moisture buildup and ensuring a stable base for the shingles.
Installation Techniques for Different Types of Shingles
Each shingle material has its installation techniques and requirements. For example, asphalt shingles are typically nailed in a specific pattern, while slate and wood shingles may require specialized fasteners and additional underlayment layers.
Shingle Installation Techniques
With the underlayment and flashing in place, the shingle installation process can begin. I have extensive experience in installing various types of shingles, including asphalt, wood, metal, slate, and composite materials. Each type requires specific techniques and considerations, but there are common principles that apply across the board.
Use of Underlayment and Flashing
Underlayment and flashing are crucial components of a shingle roofing system. Underlayment provides an additional layer of protection against moisture while flashing is used to seal intersections and protrusions on the roof, preventing water from seeping in.
Nailing Patterns and Spacing
Proper nailing patterns and spacing are essential for ensuring the shingles are securely fastened to the roof deck. Improper nailing can lead to shingle blow-offs, leaks, and premature failure of the roofing system.
Nailing Pattern for Asphalt Shingles
For asphalt shingles, a common nailing pattern involves placing nails approximately 6 inches from the bottom edge of the shingle and spaced at 12 inches apart across the course.
As an experienced civil engineer and construction specialist, I understand the importance of following proper nailing patterns and spacing for different types of shingle materials. Adhering to industry standards and best practices is crucial to ensure the shingles are securely fastened, resistant to wind uplift, and able to perform as intended. Based on my extensive knowledge and expertise, I have compiled a detailed data table that covers the nailing patterns and spacing requirements for various shingle types used in roofing applications.
Table: Nailing Patterns and Spacing for Shingle Roofing Materials
| Shingle Type | Nailing Pattern | Nail Spacing | Additional Considerations |
|---|---|---|---|
| Asphalt Shingles (3-Tab) | 4 nails per shingle | 6 inches from bottom edge, 1 inch from each end | Ensure nails are properly driven and not overdriven or underdriven. Use corrosion-resistant nails. |
| Asphalt Shingles (Dimensional/Architectural) | 4 nails per shingle | 6 inches from bottom edge, 1 inch from each end | Follow manufacturer’s specific guidelines for nail placement on different shingle sections. Use nails suitable for the shingle thickness. |
| Wood Shingles | 2 nails per shingle | 3/4 inch from sides, 1 inch from top | Use hot-dipped galvanized or stainless steel nails to prevent corrosion. Avoid overdriving nails. |
| Wood Shakes | 2 nails per shake | 3/4 inch from sides, 1-1/2 inches from top | Use larger-diameter nails (e.g., 6d or 7d) to accommodate the thickness of wood shakes. Space nails closer for better wind resistance. |
| Metal Shingles (Aluminum or Steel) | Follow manufacturer’s guidelines | Varies by manufacturer | Use nails compatible with the metal type to prevent galvanic corrosion. Avoid overdriving nails to prevent denting or cracking the metal. |
| Metal Shingles (Copper) | Follow manufacturer’s guidelines | Varies by manufacturer | Use solid copper or stainless steel nails to prevent corrosion. Avoid overdriving nails to prevent denting or cracking the copper. |
| Slate Shingles | 2-3 nails per shingle | 3/4 inch from sides, 1-2 inches from top | Use hot-dipped galvanized or stainless steel nails to prevent corrosion. Avoid overdriving nails, as slate is brittle. |
| Composite Shingles | Follow manufacturer’s guidelines | Varies by manufacturer | Use nails compatible with the composite material. Ensure proper nail length and spacing to accommodate the shingle thickness and design. |
Nailing Pattern Guidelines for Common Shingle Types
| Shingle Type | Nailing Pattern | Nail Spacing |
|---|---|---|
| Asphalt Shingles | 4 nails per shingle | 6 inches from bottom edge, 1 inch from each end |
| Wood Shingles | 2 nails per shingle | 3/4 inch from the sides, 1 inch from the top |
| Metal Shingles | Varies by manufacturer | Follow specific guidelines |
| Slate Shingles | 2-3 nails per shingle | 3/4 inch from sides, 1-2 inches from top |
Nailing Pattern for Wood Shingles
Wood shingles require a different nailing pattern, typically with two nails per shingle, placed about 3/4 inch from the sides and 1 inch from the top.
Ridge Cap Installation
The ridge cap, or the final course of shingles along the roof’s peak, is a crucial component that requires proper installation to prevent water infiltration and ensure a finished, aesthetically pleasing look.
Architectural Shingle Overlap and Alignment
As an experienced professional in the roofing industry, I cannot overstate the importance of proper shingle overlap when it comes to architectural shingles. Architectural shingles, also known as dimensional or laminated shingles, are thicker and more textured than traditional 3-tab shingles, offering enhanced aesthetics and durability.
However, their unique design requires precise overlap measurements during installation to ensure a seamless and watertight roofing system. The recommended architectural shingle overlap typically ranges from 5 to 6 inches, depending on the manufacturer’s specifications. This overlap creates a double layer of protection and helps prevent water infiltration, particularly in areas prone to high winds or heavy precipitation.
Failure to adhere to the proper overlap can compromise the integrity of the roof, leading to potential leaks, shingle blow-offs, and premature deterioration. Throughout my career, I have witnessed the consequences of improper shingle overlap, which often result in costly repairs and replacements.
Therefore, when working with architectural shingles, it is crucial to follow the manufacturer’s guidelines meticulously and maintain the recommended overlap measurements. This attention to detail not only ensures the longevity and performance of the roofing system but also preserves the intended aesthetic appeal of these premium shingles.
Shingle Roofing Maintenance and Repair
Regular maintenance and timely repairs are essential for maximizing the lifespan and performance of shingle roofing.
As an experienced civil engineer and construction specialist, I understand the critical importance of regular inspections and scheduled maintenance for shingle roofing systems. Proper maintenance not only extends the lifespan of your roof but also helps identify and address potential issues before they escalate into major problems. To ensure a comprehensive approach, I have created a detailed dataset table that outlines the recommended inspections, timetables, methods, and techniques for shingle roof maintenance.
H4: Dataset Table: Scheduled Maintenance and Inspection for Shingle Roofing
| Inspection Type | Frequency | Timetable | Methods | Techniques |
|---|---|---|---|---|
| Exterior Visual Inspection | Annual | Spring or Fall | Ground-level observation Binocular inspection | Inspect for cracked, curled, or missing shingles <br> Check for debris accumulation <br> Look for potential leak sources <br> Assess overall roof condition |
| Interior Attic Inspection | Annual | Spring or Fall | Physical inspection Moisture meter readings | Check for water stains or mold growth <br> Detect moisture buildup <br> Evaluate ventilation and insulation |
| Gutter and Downspout Cleaning | Annual | Spring and Fall | Manual removal of debris Flushing with water | Clear gutters and downspouts of leaves, branches, and buildup <br> Ensure proper water drainage |
| Professional Roof Inspection | Every 2-3 Years | Spring or Fall | Experienced roofing contractor Aerial inspection (if applicable) | Comprehensive assessment of roof condition Identify areas of concern or potential issues Provide recommendations for repairs or maintenance |
| Sealant and Flashing Inspection | Every 5-7 Years | Spring or Fall | Close visual inspection Moisture testing | Check sealants and caulking around roof penetrations Inspect flashing for damage or deterioration Reseal or replace as needed |
| Shingle Replacement Consideration | Every 10-15 Years | Spring or Fall | Professional evaluation Core sample analysis (if needed) | Assess overall shingle condition and remaining lifespan Determine if partial or full replacement is required |
| Repair Damaged Shingles | As Needed | Anytime | Visual inspection Physical repair | Promptly replace cracked, curled, or missing shingles Use manufacturer-approved repair methods and materials |
| Debris and Vegetation Removal | As Needed | After storms or seasonal | Manual removal Roof raking or blowing | Clear any accumulated debris, branches, or vegetation from roof surface Prevent moisture buildup and potential damage |
| Ventilation and Insulation Checks | As Needed | Anytime | Attic inspection Moisture meter readings | Ensure proper attic ventilation and insulation levels Maintain optimal temperature and moisture levels |
Please note that the frequency of inspections and maintenance tasks may vary depending on the specific shingle material, the age of your roof, local weather conditions, and other factors.
Regular Inspections
Periodic inspections, at least once a year or after severe weather events, can help identify potential issues before they become major problems. Look for signs of damage, such as cracked, curled, or missing shingles, as well as any signs of moisture intrusion.
Cleaning Procedures
Proper cleaning can help remove debris, algae, and other organic growth that can accelerate the deterioration of shingles. Follow the manufacturer’s recommended cleaning methods and solutions to avoid damaging the shingles or compromising their protective coatings.
Repairing Damaged Shingles
If shingles become cracked, torn, or blown off, it’s essential to replace them promptly to prevent further damage and leaks. The repair process typically involves removing the damaged shingles, inspecting the underlying area, and installing new shingles following the manufacturer’s instructions.
Handling Leaks and Water Damage
Leaks can lead to significant water damage if not addressed promptly. If a leak is detected, it’s crucial to locate the source, make temporary repairs to prevent further water intrusion, and then address the underlying cause by repairing or replacing the affected shingles or roofing components.
Extending the Lifespan of Shingle Roofing
To maximize the lifespan of shingle roofing, follow the manufacturer’s recommended maintenance practices, address any issues promptly, and consider applying protective coatings or sealants as recommended by the manufacturer.
Comparing Shingle Roofing with Other Roofing Materials
While shingle roofing is a popular choice, it’s essential to understand how it compares to other roofing materials in terms of performance, cost, and aesthetic appeal.
Shingles vs. Metal Roofing
Metal roofing, such as standing seam or metal shingles, offers superior durability and longevity compared to most shingle materials. However, metal roofing can be more expensive upfront and may not offer the same aesthetic versatility as shingles.
Shingles vs. Tile Roofing
Tile roofing, whether clay or concrete, is known for its exceptional durability and resistance to fire and extreme weather conditions. However, tile roofing is generally more expensive than shingle roofing and may require additional structural support due to its weight.
Shingles vs. Slate Roofing
Slate roofing is considered one of the most durable and long-lasting roofing materials available, with a lifespan of over 100 years in some cases. However, slate is also one of the most expensive roofing options and requires specialized installation techniques due to its weight and brittle nature. Shingle roofing, while not as long-lasting as slate, offers a more cost-effective and easier installation option.
Shingles vs. Flat Roofing Options
For flat or low-slope roofs, various roofing materials like modified bitumen, EPDM (rubber), or TPO (thermoplastic polyolefin) are commonly used. While these flat roofing systems offer different advantages, such as ease of installation and cost-effectiveness, they lack the aesthetic appeal and architectural versatility of shingle roofing on sloped roofs.
Advantages and Disadvantages of Each Roofing Material
When comparing roofing materials, it’s essential to consider factors such as durability, cost, maintenance requirements, energy efficiency, and aesthetic appeal. Each material has its own set of advantages and disadvantages, and the choice ultimately depends on the homeowner’s priorities, budget, and the specific requirements of their home.
Environmental Impact and Sustainability of Shingle Roofing
As environmental concerns continue to grow, it’s crucial to consider the sustainability and ecological footprint of different roofing materials, including shingle roofing.
Recycling Options for Shingle Materials
Some shingle materials, such as asphalt and metal, can be recycled at the end of their lifespan. Asphalt shingles, for instance, can be repurposed for use in road construction or as a component in new shingle manufacturing. Metal shingles are also highly recyclable, reducing the demand for new raw materials.
Energy Efficiency Considerations
The color and reflectivity of shingle roofing can impact a home’s energy efficiency. Darker shingles tend to absorb more heat, increasing cooling costs, while lighter-colored or reflective shingles can help reduce energy consumption by reflecting solar radiation.
Impact on Indoor Air Quality
Certain shingle materials, such as asphalt and some composite shingles, may release volatile organic compounds (VOCs) that can potentially impact indoor air quality. Proper ventilation and air exchange are essential to mitigate any potential health concerns.
Sustainable Practices in Shingle Manufacturing
Manufacturers of shingle roofing materials are increasingly adopting sustainable practices, such as using recycled materials, reducing energy consumption, and implementing responsible sourcing practices for raw materials.
Long-term Environmental Benefits and Drawbacks
While some shingle materials, like wood and slate, are natural and potentially more environmentally friendly, they may contribute to deforestation or resource depletion if not sourced responsibly. Other materials, like metal and composite shingles, offer longer lifespans and recyclability, reducing the overall environmental impact over time.
Choosing the Right Shingle Roofing for Your Home
With so many options available, selecting the right shingle roofing material for your home can be a daunting task. Here are some factors to consider:
Factors to Consider When Selecting Shingle Roofing
- Climate and weather conditions in your area
- Architectural style of your home
- Budget constraints
- Desired lifespan and durability
- Maintenance requirements
- Aesthetic preferences
- Environmental impact and sustainability goals
Matching Roofing Materials with Architectural Style
The architectural style of your home should play a significant role in choosing the right shingle roofing material. For example, wood or slate shingles may complement a traditional or historic home, while metal or composite shingles can provide a modern look for contemporary designs.
Budget Considerations
Roofing materials can vary significantly in cost, from the relatively affordable asphalt shingles to the more premium options like slate or metal. Consider your budget and the long-term costs associated with installation, maintenance, and potential replacements.
Average Shingle Roof Installation Costs (per Square Foot)
| Shingle Type | Material Cost Range | Labor Cost Range | Total Cost Range |
|---|---|---|---|
| Asphalt Shingles | $1.50 – $5.00 | $2.00 – $4.00 | $3.50 – $9.00 |
| Wood Shingles | $3.50 – $8.00 | $4.00 – $6.00 | $7.50 – $14.00 |
| Metal Shingles | $5.00 – $12.00 | $3.00 – $6.00 | $8.00 – $18.00 |
| Slate Shingles | $7.00 – $20.00 | $6.00 – $10.00 | $13.00 – $30.00 |
| Composite Shingles | $4.00 – $8.00 | $3.00 – $5.00 | $7.00 – $13.00 |
Climate and Weather Resistance
Different shingle materials have varying degrees of resistance to specific weather conditions. For example, in areas prone to wildfires, non-combustible materials like metal or composite shingles may be a safer choice. In regions with heavy snowfall or high winds, certain shingle types may perform better than others.
Warranty and Durability Features
Evaluate the warranties and durability features offered by different shingle manufacturers. Longer warranties and enhanced durability features can provide peace of mind and potentially save money in the long run by reducing the need for frequent replacements.
DIY Shingle Roofing Projects
While professional installation is recommended for most shingle roofing projects, some homeowners may opt for a DIY approach, particularly for smaller repairs or replacements.
Tools and Equipment Needed
To undertake a DIY shingle roofing project, you’ll need a variety of tools and equipment, including:
- Safety gear (harness, gloves, goggles)
- Roofing hammer and nails
- Utility knife
- Pry bar
- Roofing shovel
- Ladder or scaffolding
- Tarp or catch system for removed shingles
- Caulk and sealants
Safety Precautions for DIY Installation
Working on roofs can be hazardous, so it’s essential to prioritize safety during DIY shingle roofing projects. Use appropriate safety gear, follow proper ladder setup and usage guidelines, and consider hiring professionals for tasks that may be too risky or challenging to tackle on your own.
Step-by-Step Guides for Installing Shingle Roofing
While specific installation methods may vary depending on the shingle material, most DIY shingle roofing projects follow a general process:
- Prepare the roof surface by removing old shingles and inspecting the roof deck for any necessary repairs.
- Install underlayment and flashing as per the manufacturer’s instructions.
- Begin shingle installation, following the appropriate nailing patterns and spacing guidelines.
- Properly install ridge caps, vents, and other roofing components.
- Conduct a final inspection and clean up the work area.
Common Mistakes to Avoid
Some common mistakes to avoid during DIY shingle roofing projects include:
- Improper nailing patterns or nail placement
- Failure to install an underlayment or flashing correctly
- Inadequate ventilation or improper roof deck preparation
- Disregarding safety precautions or working in adverse weather conditions
Tips for Successful DIY Shingle Roofing Projects
To increase the chances of success with DIY shingle roofing projects, follow these tips:
- Read and follow all manufacturer’s instructions carefully
- Consider taking a roofing course or seeking guidance from experienced professionals
- Work on smaller sections or practice on a shed or outbuilding before tackling the main roof
- Ensure proper fall protection and safety measures are in place
- Don’t hesitate to call in professional help if the project becomes too challenging or unsafe
Conclusion
Shingle roofing offers a versatile and aesthetically pleasing solution for homeowners seeking to protect their homes while enhancing their curb appeal. From the classic charm of wood shingles to the modern sleekness of metal and composite options, there is a shingle material to suit every architectural style and budget.
However, choosing the right shingle roofing material is just the first step. Proper installation, maintenance, and timely repairs are crucial for ensuring the longevity and performance of your shingle roof. By understanding the various types of shingle roofing, their pros and cons, and the installation and maintenance processes, you can make an informed decision that meets your specific needs and preferences.
Remember, a well-executed shingle roofing project not only enhances the beauty of your home but also provides essential protection against the elements, contributing to the overall safety and comfort of your living space.
Key Takeaways
- Shingle roofing offers a wide range of materials, including asphalt, wood, metal, slate, and composite options, each with its own unique characteristics and advantages.
- Proper installation techniques, including the use of underlayment, flashing, and correct nailing patterns, are essential for the performance and longevity of shingle roofing.
- Regular maintenance, inspections, and timely repairs can extend the lifespan of shingle roofing and prevent costly damage from water intrusion or other issues.
- Consideration of factors such as climate, architectural style, budget, and environmental impact can help homeowners choose the most suitable shingle roofing material for their needs.
Queries Answered Based on My Expertise
How important is proper shingle installation, and what are the consequences of a poor installation?
As an experienced civil engineer, I cannot stress enough the importance of proper shingle installation. Even the slightest mistake or oversight during the installation process can compromise the integrity and longevity of your roof. Poor installation can lead to costly issues, such as shingle blow-offs, water infiltration, and premature deterioration, ultimately requiring expensive repairs or replacements.
What are the most common mistakes homeowners make when attempting a DIY shingle roofing project?
From my years of experience, some of the most common mistakes I’ve witnessed in DIY shingle roofing projects include improper nailing patterns, inadequate underlayment installation, failure to follow manufacturer guidelines, and disregarding safety precautions. These mistakes can not only jeopardize the performance of the roof but also put homeowners at risk of injury.
How can I ensure I’m selecting the right shingle material for my home and climate?
When choosing a shingle material, I recommend considering factors such as your local climate conditions, the architectural style of your home, budget constraints, and desired lifespan. Different shingle materials have varying degrees of weather resistance, aesthetic appeal, and durability. Consulting with an experienced professional can help you make an informed decision tailored to your specific needs.
What are the signs that my shingle roof needs maintenance or repair?
Some common signs that I advise homeowners to watch out for include cracked, curled, or missing shingles, granule loss, water stains or leaks in the attic, and moss or algae growth on the roof surface. Addressing these issues promptly can prevent further damage and extend the lifespan of your roof.
How often should I have my shingle roof professionally inspected?
I typically recommend having your shingle roof professionally inspected every 2-3 years, or sooner if you notice any signs of damage or after severe weather events. Regular inspections by a reputable roofing contractor can identify potential issues before they escalate into major problems.
Can I install new shingles over an existing shingle layer?
In most cases, I advise against installing new shingles over an existing layer. While it may seem like a cost-effective solution, it can lead to numerous issues, such as reduced lifespan, increased risk of moisture buildup, and potential code violations. Proper preparation, including complete removal of the old shingles, is essential for a successful installation.
How can I ensure my shingle roof is properly ventilated?
Proper ventilation is crucial for the performance and longevity of your shingle roof. I recommend ensuring adequate attic ventilation by installing properly sized ridge vents, soffit vents, and any necessary exhaust fans. Inadequate ventilation can lead to moisture buildup, premature shingle deterioration, and even ice damming in colder climates.
What safety precautions should I take when working on a shingle roof?
Safety should always be the top priority when working on a roof. I strongly advise using appropriate safety equipment, such as harnesses, roof anchors, and non-slip shoes. Never work alone, and take breaks as needed to prevent fatigue and potential accidents.
How can I extend the lifespan of my shingle roof?
To extend the lifespan of your shingle roof, I recommend following a regular maintenance schedule that includes annual inspections, debris removal, and prompt repairs. Additionally, consider applying protective coatings or sealants as recommended by the manufacturer to enhance the shingles’ resistance to weathering and UV exposure.
What are the factors that can impact the cost of a shingle roofing project?
The cost of a shingle roofing project can vary significantly depending on several factors, such as the shingle material chosen, the size and complexity of the roof, the geographical location, and the need for any additional repairs or upgrades. I advise homeowners to obtain multiple quotes from reputable contractors and factor in both material and labor costs.
How can I determine if it’s time for a full shingle roof replacement?
There are several indicators that I look for when evaluating the need for a full shingle roof replacement. These include extensive granule loss, widespread cracking or curling of shingles, numerous leaks or water damage, and overall degradation of the roofing system. If the roof is nearing the end of its expected lifespan or the repairs needed are substantial, a replacement may be the most cost-effective solution.
What is the recommended shingle overlap, and why is it important?
The recommended shingle overlap varies by shingle type and manufacturer, but I typically advise maintaining an overlap of 5-6 inches for dimensional or architectural shingles. Proper overlap is crucial for creating a weathertight barrier and preventing water infiltration, particularly in areas prone to high winds or heavy precipitation.
How can I ensure my shingle roof is properly flashed, and why is it important?
Flashing is an essential component of a shingle roofing system, as it provides a watertight seal around protrusions, valleys, and intersections. I recommend using high-quality flashing materials, such as metal or rubber, and ensuring proper installation techniques to prevent water seepage and potential leaks.
What are the advantages and disadvantages of different shingle materials, such as asphalt, wood, metal, and composite?
Each shingle material has its own set of advantages and disadvantages. I can provide a detailed comparison, taking into account factors such as durability, cost, aesthetic appeal, maintenance requirements, and environmental impact. Understanding these differences can help you make an informed decision that aligns with your priorities and budget.
How can I identify and address potential moisture or ventilation issues in my attic?
To identify moisture or ventilation issues in your attic, I recommend conducting regular inspections for water stains, mold growth, or condensation buildup. Additionally, using a moisture meter can help detect elevated moisture levels. If issues are found, addressing them promptly by improving ventilation, and insulation, or repairing any roof leaks is crucial to prevent further damage.
What are the best practices for maintaining and cleaning a shingle roof?
For optimal shingle roof maintenance, I advise following a regular cleaning schedule to remove debris, moss, or algae growth. Gentle cleaning methods, such as using a soft-bristled brush and mild detergent, are recommended to avoid damaging the shingles. Additionally, trimming overhanging branches and ensuring proper drainage can help prevent unnecessary buildup on the roof surface.
How can I ensure my shingle roof is properly nailed, and what are the consequences of improper nailing?
Proper nailing is essential for securing shingles and preventing wind uplift and blow-offs. I recommend following the manufacturer’s guidelines for nail placement, spacing, and type. Improper nailing can lead to shingles lifting or detaching, ultimately compromising the roof’s integrity and allowing water infiltration.
What are the signs that my shingle roof may have sustained storm damage, and what steps should I take?
After severe weather events, such as hail storms or high winds, I advise carefully inspecting your shingle roof for signs of damage, including cracked, dented, or missing shingles, as well as granule loss or dislodged flashing. If you suspect storm damage, it’s crucial to have a professional roofing contractor assess the extent of the damage and recommend necessary repairs or replacements.
How can I ensure my shingle roof meets local building codes and regulations?
Building codes and regulations can vary by location, and I strongly recommend consulting with local authorities or hiring a reputable roofing contractor who is well-versed in the specific requirements of your area. Failure to meet building codes can not only compromise the safety and performance of your roof but also lead to potential fines or legal issues.
What are the environmental considerations when choosing and maintaining a shingle roof?
Environmental considerations are becoming increasingly important in the roofing industry. I advise exploring options for recycled or sustainable shingle materials, as well as proper disposal methods for old shingles. **Additionally, consider the energy efficiency and impact on indoor air quality of different shingle types to make an informed and environment
How can I ensure proper shingle roof installation on complex roof structures, such as gable roofs or multiple levels?
Complex roof structures, like gable roofs or multi-level buildings, require additional care and attention during shingle installation. In my experience, it’s crucial to follow the manufacturer’s guidelines for proper flashing, underlayment, and nailing patterns specific to these roof types. Additionally, I recommend consulting with a professional roofing contractor who has expertise in handling complex roof structures to ensure a proper and long-lasting installation.
What are the best practices for shingle roof maintenance in extreme weather conditions, such as high winds or heavy snowfall?
In areas prone to extreme weather conditions, I advise taking extra precautions to ensure the longevity and performance of your shingle roof. This may include using enhanced weatherproofing measures, such as reinforced underlayment or additional flashing, as well as regular maintenance tasks like clearing snow buildup or securing loose shingles after high winds.
How can I ensure proper ventilation and insulation for my shingle roof, and why is it important?
Proper ventilation and insulation play a crucial role in the performance and lifespan of your shingle roof. I recommend ensuring adequate attic ventilation through properly sized and installed vents, while also maintaining appropriate levels of insulation. This not only helps regulate temperature and moisture levels but also prevents issues like ice damming, premature shingle deterioration, and increased energy costs.
What are the signs that my shingle roof’s underlayment or flashing needs replacement or repair?
Telltale signs that the underlayment or flashing on your shingle roof needs attention include water stains or leaks in the attic, peeling or deteriorated flashing, and visible gaps or damage to the underlayment. I advise addressing these issues promptly to prevent further damage and potential water infiltration.
How can I properly dispose of or recycle old shingle materials during a roof replacement?
When replacing a shingle roof, I recommend exploring eco-friendly disposal or recycling options for the old shingle materials. Many local municipalities and waste management facilities offer programs for recycling asphalt shingles, which can be repurposed for various applications. Proper disposal not only reduces waste but also helps minimize the environmental impact of your roofing project.
What are the advantages and disadvantages of hiring a professional roofing contractor versus attempting a DIY shingle roof installation?
While DIY shingle roof installations can seem cost-effective, they come with inherent risks and challenges that should not be overlooked. Professional roofing contractors bring expertise, experience, and the necessary equipment to ensure a proper and safe installation. However, hiring a contractor can be more expensive upfront. I can provide a detailed comparison to help you weigh the pros and cons and make an informed decision based on your specific situation.
How can I ensure my shingle roof is properly installed and maintained in coastal or high-wind areas?
In coastal or high-wind areas, I recommend using shingle materials and installation techniques specifically designed for enhanced wind resistance. This may include using high-wind-rated shingles, reinforced underlayment, and additional nailing patterns or adhesives. Regular maintenance, such as securing loose shingles or checking for potential damage after severe weather events, is also crucial in these harsh environments.
What are the best practices for maintaining and extending the lifespan of premium shingle materials, such as slate or cedar shakes?
Premium shingle materials like slate or cedar shakes require specialized maintenance practices to ensure their longevity. For slate, I advise regular cleaning and repairing any cracked or damaged tiles promptly. For cedar shakes, maintaining proper ventilation, cleaning, and applying preservatives or treatments can help extend their lifespan. Additionally, following the manufacturer’s recommendations for maintenance and care is crucial for these high-end roofing materials.
How can I identify and address potential ice damming issues on my shingle roof during winter months?
Ice damming can be a significant issue for shingle roofs in colder climates, potentially leading to water damage and premature shingle deterioration. To identify and address ice damming, I recommend regular inspections during winter months, ensuring proper attic ventilation and insulation, and considering the installation of heat cables or ice melt systems in problematic areas.
What are the best practices for addressing and repairing shingle roof leaks, and when is it necessary to consider a full replacement?
When addressing shingle roof leaks, I advise promptly locating and repairing the source of the leak, which may involve replacing damaged shingles, flashing, or underlayment. However, if the leaks are widespread or the roof is nearing the end of its expected lifespan, a full roof replacement may be the more cost-effective and long-term solution. I can provide a professional assessment and recommendations based on the extent of the damage and the age of your roofing system.
Throughout these FAQs, I have aimed to showcase my expertise in Shingles Roofing as a licensed civil engineer and construction specialist with over 25+ years of experience in the industry. By providing detailed, first-hand insights, best practices, and practical recommendations, I hope that my article equips homeowners and contractors with the essential knowledge needed to avoid costly mistakes and achieve successful, long-lasting shingle roofing installation and maintenance.