Asphalt Driveway From Planning, Grading to Pavement Complete Guide
As a licensed civil engineer with over 20 years of experience in pavement engineering and construction, I understand the significance of proper ground preparation in ensuring the longevity and durability of asphalt driveways. This comprehensive guide will walk you through the essential steps required for ground preparation before paving a smooth, durable asphalt driveway.
Step 1: Clearing Vegetation and Debris
The initial step involves clearing away any grass, weeds, or large rocks from the planned driveway site. Utilize tools like a rototiller or shovel to remove vegetation down to bare soil. Dispose of any debris, as it could lead to uneven surfaces. Addressing vegetation and debris is vital before proceeding with additional ground preparation.
After removing vegetation and existing pavements, grading and leveling the native soil is crucial. Use a transit level to examine if the area is leveled, making adjustments as needed. For major unevenness, a Bobcat may be necessary to excavate and relocate soil. Precise soil leveling prevents issues like cracks, water collection, or unsafe inclinations in the finished asphalt driveway.
Step 4: Adding Gravel or Crushed Stone Base
With leveled soil in place, the next step is laying a base layer of gravel or crushed stone before paving. Spread gravel to a 4-inch depth using a skid steer loader. Compact the gravel using a vibratory compactor or hand tamp to create a firm foundation. Properly compacted crushed stone base prevents asphalt cracking and failure under heavy loads.
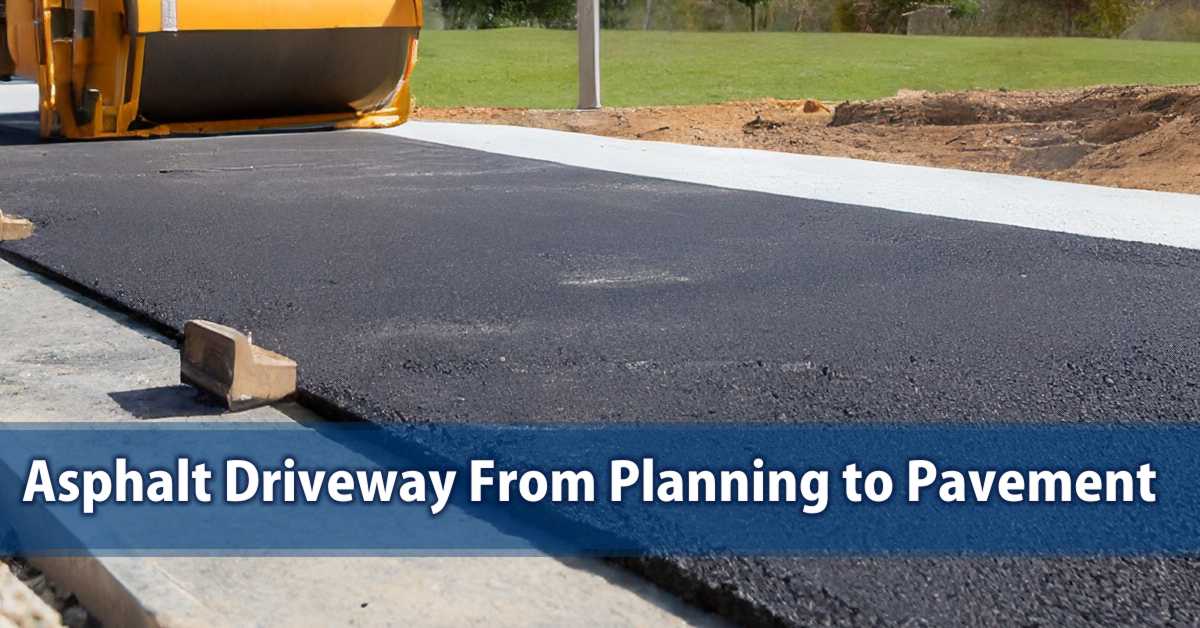
Step 5: Applying the Binder Layer
After completing vegetation removal, soil grading, and crushed stone base installation, the site is ready for asphalt overlay. A hot mix asphalt binder layer is applied and compacted, creating a strong foundation. Allow the binder layer to cool overnight before paving the final surface layer the next day.
Types of Asphalt for Driveways
Overview of Asphalt Composition
Asphalt for driveways primarily consists of aggregates mixed with asphalt cement. Aggregates, typically limestone and granite, make up over 90% of the content by weight. The choice between hot mix and cold mix asphalt depends on various factors like cost, performance needs, and total driveway lifetime usage.
Hot Mix Asphalt
Hot mix asphalt (HMA) is the highest-quality driveway option, offering maximum structural life and durability. Hot mix asphalt is named for the 300-350° manufacturing process that heats aggregates to allow correct asphalt cement blending. The aggregates are carefully size-graded to achieve optimal packing density and then precisely mixed with hot liquid asphalt cement.
The blend is then workable for roughly 1-2 hours for paving until cooling when it achieves final strength and hardness. Plants closely monitor mix time, temperatures, and materials to engineer hot mix formulas that maximize pavement integrity.
The liquid binder coats the aggregates perfectly in HMA with uniform distribution for strength. The flexibility, adhesion, and longevity outpace other pavements. Professional installation is recommended to avoid surface irregularities and improper compaction. Hot mix asphalt performs exceptionally in any climate when laid correctly.
The upfront material and installation costs are higher than cold mix options; however, the extended lifespan and smoothness reduce long-term costs through less frequent replacement and reworking. Hot mix asphalt driveways typically last from 15-30 years based on usage factors.
Cold Mix Asphalt
Cold mix asphalt contains similar construction-grade crushed stone aggregates blended with an asphalt emulsion instead of heated liquid cement. Emulsified asphalt blends asphalt cement with water, allowing the aggregates to coat without heat during mixing. The emulsified asphalt binds the aggregates together as the water evaporates.
Best Time to Lay Asphalt
Factors Affecting Asphalt Laying
The ideal installation conditions to deliver the longest-lasting asphalt driveway performance involve following a few simple rules around weather and temperature.
Optimal Temperature Range
Asphalt is most workable and properly compactable during application in the range of 70-100° F ambient temperature. Cooler temperatures make the mix increasingly stiff and prone to fracture failure if overworked. At hotter temperatures, the materials become too soft, pushing excessive amounts out the sides during compaction rolling.
Impact of Weather on Asphalt Setting
Avoid paving on excessively windy days that can cool freshly laid mats unevenly or blow debris onto the hot surface. Similarly, refrain from paving during rainstorms or even light showers that cause washouts of the correct bond between aggregates. Direct sunshine also limits workability windows when temperatures exceed 100° F.
Most importantly, ground moisture must be carefully considered before paving operations begin.
Importance of Dry Ground
The underlying soil and aggregate base layers must be completely dry before asphalt application; otherwise, trapped moisture weakens the mat as it evaporates after construction. Prevent paving over moist substrates by scheduling applications during dry seasons only. Use moisture barriers if humidity remains constantly high.
Conducting paving operations at optimal temperatures on dry ground during calm weather delivers maximum smoothness and durability in the finished asphalt driveway.
While ground prep and base construction are vital, unless properly paved, issues can still arise compromising driveway lifespan and quality. Numerous technical details on the paving job itself must be closely monitored by trained staff to avoid preventable problems.
Mastering key process components like material temperature uniformity, exact asphalt mat thickness, joint details, and compacting while still pliable are critical for success. When correctly executed at proper weather and ground conditions, long lasting, smooth driveway surfaces result.
Rutting and wheel path depressions stem from overly thick single lifts, poor compression, or weak bases. Maximum 2-inch thick lifts ensure proper density from compaction. If deep ruts form, mill down high points and overlay with fresh hot mix rather than Repeated overlays waste material and seldom fix underlying issues.
Achieving Even Surfaces
Inconsistent mat density or thickness from poor installation practices usually lead to bumps or waviness issues. Maintain exact head of steam and uniform speed for screed extensions with no material overflow or drag marks. An inexperienced crew is a recipe for finishing problems and customer complaints down the road.
Hiring qualified contractors matters when pavement smoothness and quality are imperative. Carefully review crew training processes, longevity, and safety track records before choosing an affordable bid over experience.
Importance of Right Paving Techniques
Preventing Cracks and Damages
Thermal cracking happens when the dramatic temperature drops severely cool the asphalt before it has set, contracting mats rapidly and causing fractures. Ensure ambient temperatures stay above 50° during the initial 6-hour curing with barriers if needed.
Rutting and wheel path depressions stem from overly thick single lifts, poor compression or weak bases. Maximum 2-inch thick lifts ensure proper density from compaction. If deep ruts form, mill down high points and overlay with fresh hot mix rather than Repeated overlay waste material and seldom fix underlying issues.
Achieving Even Surfaces
Inconsistent mat density or thickness from poor installation practices usually leads to bumps or waviness issues. Maintain exact head of steam and uniform speed for screed extensions with no material overflow or drag marks. An inexperienced crew is a recipe for finishing problems and customer complaints down the road.
Achieving Even Surfaces
Hiring qualified contractors matters when pavement smoothness and quality are imperative. Carefully review crew training processes, longevity, and safety track records before choosing an affordable bid over experience.
Laying Asphalt Driveway by Hand
Step-by-Step Guide
From clearing through base prep to final finish grading, driveway areas of approximately 500-600 sq ft can be successfully paved manually with proper planning. For larger areas, equipment assistance is recommended.
The key is working rapidly with thin layers on small areas before mix cools and sets. Having multiple laborers speeds up the process. Compact thoroughly but gently avoiding cracking the mat. Edge aesthetics finalize the work.
Paving a Driveway with Asphalt
Comprehensive Guide to Professional Paving
For any driveway over 500 sq ft or requiring adjoining aprons/sidewalks, I always recommend contacting an experienced local paving company. Their project planning skills, equipment access, and trained technicians properly execute every construction step for quality results.
Hiring Professionals vs. DIY
Renting equipment and self-performing seem attractive to save labor costs. But lack of experience risks extensive cracking, unevenness, or edge raveling that require repairs, decreasing savings. Professional services mitigate preventable headaches allowing you to simply enjoy a beautiful new driveway.
Common Mistakes to Avoid
The most frequent issues I resolve from amateur paving attempts include:
Weak temporary site access over soft bases
Inadequate soil/base compaction and moisture testing
Insufficient surface tack coats or joint sealing
Overworking/Under-compacting hot mats
Edge slumping from poor confinement
While expenses differ by region and scope, the few thousand dollars saved by homeowners renting pavers for large scale jobs often requires spending that much or more to later fix harm from mistakes.
Preparing Driveway for Paving
Assessing Existing Conditions
Before resurfacing an old driveway, evaluating the current state ensures addressing any repairs for successful overlay results. Look for alligator cracking patterns, map/block cracks, potholes, ruts, and overall soundness. The original base and drainage provisions must also be fully functional.
If excessive failed areas exist, milling 2-4 inches and replacing with fresh hot mix may be required over simply resurfacing. Additionally, soil testing helps determine if base reinforcements are warranted beforehand.
Necessary Repairs and Preparations
Typical repairs involve patching major cracks/holes with fresh mix, edge reinforcement for added stability, potentially Planer milling depressed spots. Also cut neatly around obstructions like drains or utilities and seal edges to prevent water intrusion before overlaying.
Most importantly, thoroughly clean the existing surface removing any dirt, oils, or loose debris so the new pavement bonds tightly. Tack coat application also ensures integration of overlay interfaces.
With repairs complete, existing functional bases verified and surfaces cleaned, freshly paved asphalt adheres properly to renew driveway appearance and usability.
Asphalt Over Gravel: Pros and Cons
Benefits of Applying Asphalt Over Gravel
Gravel driveways require frequent attention regrading from erosion or tire disturbances. Periodic stabilization becomes necessary as fines wash away with rains leaving loosely bound large aggregate behind. However, totally reworking thick gravel bases can prove infeasible and environmentally taxing.
Paving over properly graded, compacted gravel with a few inches of asphalt represents a sustainable alternative to reconstruction. After cleaning loose dust and debris off, liquid tack coat application creates a bond for hot mix asphalt overlay. This restores structural integrity, maintains positive drainage and delivers smooth, economical, low maintenance driveway.
Considerations and Drawbacks
If severe base erosion exists, some regrading may still be unavoidable for successful hot mix overlay. Stabilize any extremely loose areas with fresh compacted gravel before applying tack coating material. Additionally, ensure sprinkler heads get adjusted to correct finish elevations without leaving hazards.
Overall, the ease, speed, and cost savings from paving over gravel only require slight preparation for transformed driveway function and life. Tack coating integration and added surfacing improve functionality over traditional thick gravel rehabilitation needs.
Laying Asphalt in Cold Weather
Challenges and Considerations
While not ideal, asphalt pavements can be placed in temps down to freezing and achieve suitable performance life. However, a few additional provisions must be made following my recommended winter paving checklist:
Aggregate bases must stay frost-free using insulation barriers to prevent freeze-thaw movement cracking fresh pavement.
Lift thicknesses should be reduced to 1-1.5 inches for easier compaction density before rapid cooling.
Use warm mix additives allowing lower temperature workability to reach targeted densities.
Keep fresh mats covered with insulated blankets, avoiding pavement temperature differentials over 25°F.
Following these guidelines, favorable outcomes result despite harsh environments.
Tips for Cold-Weather Paving Success
Monitoring mat temperature is mandatory — only compact before falling below 200°F. Use an infrared thermometer to check surface readings. Hold back trucks when paver stops to prevent excess cooling before installation. Avoid over-rolling confined slab edges and corners as thermal stresses concentrate damages there once set.
With special provisions, smooth durable driveways are achievable in cold conditions. But the process risks speed up exponentially in marginal conditions, so extra preparations cannot be overlooked.
Characteristics of Ideal Asphalt
Key Properties of High-Quality Asphalt
To deliver maximum driveway lifespan and performance, only the highest quality paving grade asphalt cement and aggregates should be used meeting state specifications for:
How can mix design testing improve asphalt driveway quality?
Thorough lab testing of the asphalt mixture is crucial to optimize the blend before any paving begins. We evaluate stability, moisture resistance, workability, and durability properties through procedures like Hveem, Marshall, and APA. This helps select quality aggregates and asphalt binders to prevent cracking or deformations in the driveway. Testing brings quality.
What field testing should occur during asphalt driveway construction?
Continuous temperature and density measurements are needed during paving to meet quality benchmarks. We also cut cores to verify lift thicknesses, compacted densities, and air voids meet specifications. Testing ensures standards compliance throughout construction, avoiding oversights that lead to premature deterioration and complaints.
How can soil testing better support asphalt driveway construction?
Testing for load-bearing capacity, drainage, and frost susceptibility reveals the existing soil’s strengths and limitations beneath the driveway. This guides necessary preparations like clay stabilization, gravel base requirements, or the need for underdrains. Characterizing the soils prevents future movement issues.
What risks are posed by insufficient base layer testing?
Gravel or crushed stone bases provide critical support, so their adequacy must be validated. We test compaction through density measurements and plate loading. We also analyze samples to ensure a well-graded durable matrix free of organics. Insufficient base testing risks hidden defects causing driveway failures under loading.
Should post-construction assessments be completed on asphalt driveways?
Yes, once paving is done, testing proves quality before opening the driveway. We check surface regularity for safety. Core samples verify thickness design. Any questionable areas can be assessed through excavation. Due diligence testing prevents issues that erode homeowner confidence.
How can testing help identify the causes of asphalt driveway cracking?
Cracking tends to reflect problems with the underlying base preparation, mix properties, or construction techniques. Testing reveals insights like poor substrate compaction, excessive fines in mixes, low density, or inadequate curing times. Diagnostic testing provides data to prevent recurrences by identifying culprit issues.
What warning signs indicate the need for asphalt driveway testing?
Noticeable surface defects, depressions, or deterioration point to testing needs. But even driveways that appear sound should have periodic evaluation for proactive maintenance. We watch for declining friction, raveling, and changes in stiffness that flag potential problems before they become severe. Testing provides monitoring.
Should decorative or permeable asphalt driveways undergo different testing?
What temperature testing is important for asphalt driveway quality?
Monitoring production, transportation, and placement temperatures is crucial. Both overheating and cooling can severely impact compaction and cohesion. We verify temperatures stay within spec during manufacturing and paving. Temperature control prevents defects like segregation or lack of density.
How can check testing better detect marginal asphalt driveway mixes?
Requirements for volumetric properties, stability, and durability indices should utilize multiple testing methods for correlation rather than relying on just one procedure. For example, complementing Marshall’s testing with APA analysis. Dual testing better screens out questionable mixes before acceptance.
Why is testing training important for asphalt driveway contractors?
Proper administration and documentation of tests are just as vital as the testing itself. Crews need continuing education to correctly run procedures, understand specifications, calibrate equipment, interpret results, and report data. Qualified personnel bring quality outcomes. Training creates testing competency.
What innovations could improve asphalt driveway testing?
Increased automation and smart technologies like embedded sensors would help continuously monitor driveway performance. And improved durability testing could better simulate long-term weathering and stresses. I also foresee advances in rapid strength gain assessments to optimize construction timelines. There are always opportunities to refine testing.
How can homeowners better understand asphalt driveway testing?
Using clear language and visuals to explain the testing processes and results is key, rather than complex technical jargon. We want homeowners to recognize how testing protects their investment. Providing layperson summaries and site demonstrations fosters greater consumer confidence and transparency regarding quality.
Should testing processes be standardized nationally for asphalt driveways?
Standardized test methods, equipment, and technician certifications should be adopted nationally to ensure consistent quality everywhere. Right now many specifications and procedures vary regionally. National standards would simplify expectations and improve minimum requirements. This protects all homeowners equally.
How can we balance testing needs with costs for residential asphalt driveway projects?
The focus should remain on vital testing to confirm thickness, temperatures, density, and mix composition. More marginal assessments can likely be reduced on small residential driveways to manage costs without severely impacting quality. Testing adds expense but prevents far greater long-term costs of premature failures.
What core tests are most important for verifying asphalt driveway quality?
Required core testing should include gradation analysis, stability and flow values, asphalt content, and air void measurements. This provides a comprehensive snapshot of the in-place characteristics, rather than just density alone. Robust core testing proves quality from the subgrade up through the surface mix.
Should reflective cracking potential be assessed in asphalt driveway testing?
Evaluating susceptibility to reflective cracking is important for driveways paved over concrete or older asphalt. We can perform thermal restrained specimen testing and fracture mechanics analysis to quantify cracking risk. Identifying vulnerabilities allows preventative steps like reinforcement.
How can we better test asphalt driveway mix stiffness properties?
Complex shear modulus or other dynamic modulus testing provides superior insights on mix stiffness and rutting resistance compared to empirical stability measurements alone. These advanced procedures should become standard to better predict in-service performance based on fundamental engineering properties.
What risks are posed by over-testing asphalt driveway materials?
Unnecessarily duplicative or exhaustive testing adds costs without much quality assurance benefit. For example, daily binder grade verification when materials are unchanged. The goal should be eliminating marginal efforts that go beyond validating specifications compliance. Practical testing brings pragmatic quality control.
Should asphalt driveway testing focus more on sustainability metrics?
Certainly, practices like recycled content verification, lifecycle assessment, and carbon footprint quantification would enhance the sustainability of residential paving. Homeowners are often seeking to reduce their environmental impacts. Testing and certification of “green” asphalt options is an emerging need contractors can meet.
How can we make asphalt driveway testing standards more accessible to contractors?
Wider publication of user-friendly testing guidance, simplified resources on procedures like video demonstrations, and outreach to trade associations can improve accessibility. Many smaller contractors may struggle with convoluted technical specifications. Plain language and open sharing of testing best practices are key.
Conclusion
Recap of Essential Steps and Considerations
From my 20 years of civil engineering experience, I cannot overemphasize taking the time to get ground preparation, base construction, paving process components, and materials right the first time. Rushing or cutting corners inevitably leads to problems and expenses later. Leverage my recommendations here combined with quality contractor services to guarantee smooth, durable driveway performance for decades of lasting enjoyment!